ML development is often a tangle of interconnected components. A seemingly small change in one area, like data processing, can trigger a cascade of necessary updates across feature engineering, model training, and inference pipelines. Managing this complexity manually is time-consuming and error-prone. While AI coding assistants like Cursor excel at localized tasks, they can struggle with these broad, context-heavy changes without clear guidance. This post introduces a structured workflow, leveraging Cursor’s capabilities, to navigate these multi-step modifications effectively. By establishing clear plans, maintaining a living knowledge base, enforcing test-first development, and automating sequences with rules, you create the necessary scaffolding for your AI co-pilot to handle complex, cascading changes more reliably and efficiently, turning intricate updates into repeatable processes.
By combining Cursor’s AI with disciplined ML engineering, you can turn the traditional multi-step process—planning, coding, testing, documenting, releasing—into a fluid, repeatable command sequence.
Challenge: A single change (pink) often requires updates across multiple dependent modules (blue). This workflow helps manage these cascades.
graph TD
    subgraph "Initial Change"
        A["Modify Data Processor ('data_processor.py')"]
    end

    subgraph "Cascading Updates Needed"
        B["Update Feature Calculator ('feature_calculator.py')"]
        C["Adjust Training Pipeline ('model_trainer.py')"]
        D["Modify Inference Service ('inference_service.py')"]
        E["Update Integration Tests ('tests/')"]
    end

    A --> B
    A --> C
    A --> D
    A --> E
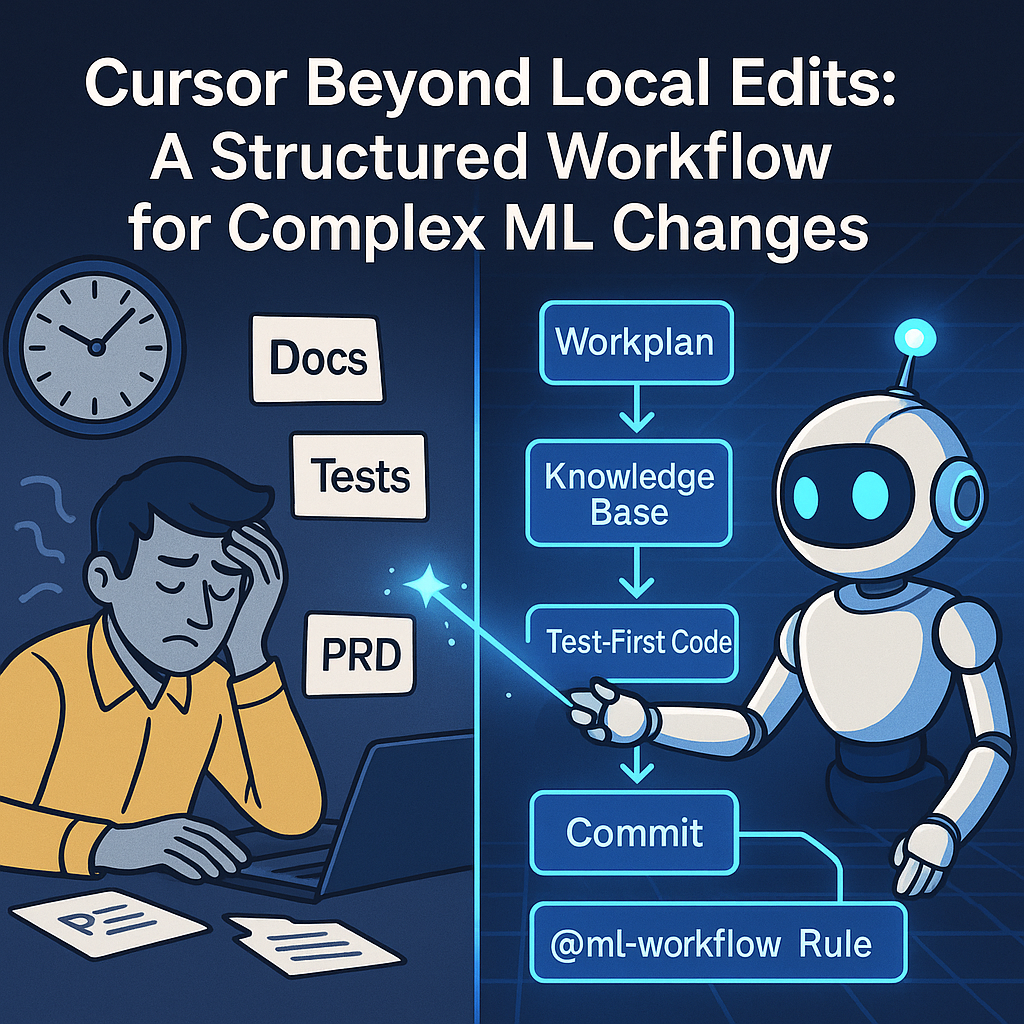
To tackle this complexity, the structured workflow I use consists of the following key steps, visualized below. By combining Cursor’s AI with these disciplined ML engineering practices, you can turn intricate multi-step modifications into a more fluid and repeatable sequence:
Workflow Idea: A simple diagram to visualize this flow:
graph LR
 A[PRD/Context] --> B[Workplan]
 B --> C[Knowledge Base]
 C --> D[Test-First Code]
 D --> E[Commit]
 E --> F["@ml-workflow Rule"]
1. 🗺️ Versioned, AI-Generated Workplans: Your Project’s North Star
A clear plan is essential. In fast-evolving ML projects, a living, versioned workplan is invaluable. It serves as a comprehensive, granular specification.
What:
A workplan is your project’s single source of truth. I use a Markdown file, workplan/V{Major}.{Minor}_*.md, detailing tasks grouped by area (data ingestion, feature engineering, etc.) with checkboxes for progress. Generated directly from a PRD or spec, it ensures alignment and captures details.
Why:
A versioned workplan provides instant clarity on scope and status. It offers an audit trail, showing project evolution. Its iterative nature allows goal refinement while maintaining focus.
How:
Cursor simplifies generating and updating this document from requirements (PRD) and context files (schema, notes).
Example PRD:
1
2
3
4
5
6
7
8
9
10
11
12
13
# Short Example PRD: User Churn Prediction Model v1.0

## Goal
Build an initial model to predict user churn probability.

## Key Requirements
- Ingest user activity data (CSV).
- Calculate 30-day login frequency feature.
- Calculate total purchase count feature.
- Train a simple logistic regression model.
- Output predictions daily.
To get a detailed workplan, reference the PRD and other files in your Cursor prompt:
-
In the Cursor chat panel, initiate creation and instruct Cursor to create the corresponding branch: (💡 Tip: Don’t hesitate to encourage the AI to ask clarifying questions if your requirements are complex or underspecified—a form of “reverse prompting” that can uncover hidden assumptions.)
Create a comprehensive workplan/V1.0_churn_prediction.md for the user churn prediction model based on the requirements in short_churn_prd.md. Refer also to data_schema.yaml and knowledge/data_ingestion_notes.md for details on data structure and common issues. Focus on Data Ingestion and Feature Engineering sections, with 3 tasks each. Also, create a new git branch named 'features/churn-v1'. Before creating the full plan, first tell a very short summary of the plan to ensure it is aligned with the PRD and other files, and then ask me clarifying questions if needed to ensure the plan is complete and accurate. I want to create the work plan in following format: # V1.0 <title of the workplan> **Branch**: <branch name> ## <section title> [ ] **Task:** <task 1> - **Goal:** <goal of the task> - **Details:** <details of the task; be as specific as possible> - **Verification:** <verification of the task; be as specific as possible> [ ] **Task:** <task 2> - **Goal:** <goal of the task> - **Details:** <details of the task; be as specific as possible> - **Verification:** <verification of the task; be as specific as possible> [ ] **Task:** <task 3> - **Goal:** <goal of the task> - **Details:** <details of the task; be as specific as possible> - **Verification:** <verification of the task; be as specific as possible> -
Cursor uses the context to generate a structured template and confirms the branch creation. Notice how it breaks down requirements into granular steps and includes details on testing/verification:
1
2
3
4
5
6
7
8
9
10
11
12
13
14
15
16
17
18
19
20
21
22
23
24
25
26
27
28
29
30
31
32
33
34
35
36
37
38
39
40
41
# V1.0 User Churn Prediction Model Workplan

**Branch**: features/churn-v1 _(Created by Cursor)_

## Data Ingestion & Preparation (from PRD: Ingest user activity data; Ref: data_schema.yaml, knowledge/data_ingestion_notes.md)

- [ ] **Task:** Define and validate schema for raw user activity data.

  - **Goal:** Ensure incoming data conforms to expected structure (`data_schema.yaml`).
  - **Details:** Use Pydantic or similar. Handle discrepancies as per `knowledge/data_ingestion_notes.md` (e.g., log errors, potentially drop malformed rows).
  - **Verification:** Write unit tests (`tests/test_data_schema.py`) to validate schema enforcement with valid and invalid data samples. **Ask Cursor to scaffold these tests.**

- [ ] **Task:** Implement script to load raw CSV data.

  - **Goal:** Efficiently read data from specified file path.
  - **Details:** Use Pandas `read_csv`. Consider chunking for large files if needed (note from knowledge base).
  - **Verification:** Write unit tests (`tests/test_data_loader.py`) for different file sizes and formats. **Use Cursor to help draft the loading logic and associated tests.**

- [ ] **Task:** Implement basic data validation checks.
  - **Goal:** Identify and handle missing values and incorrect data types.
  - **Details:** Check for `null` values in key columns (`user_id`, `timestamp`). Ensure `timestamp` is datetime type. Refer to `data_schema.yaml` for expected types.
  - **Verification:** Write unit tests (`tests/test_data_validation.py`) with data containing missing values and incorrect types. **Leverage Cursor to suggest edge cases and test data.**

## Feature Engineering (from PRD: Calculate 30-day login frequency, Calculate total purchase count)

- [ ] **Task:** Design logic for 30-day login frequency calculation.

  - **Goal:** Define the exact windowing and aggregation method.
  - **Details:** Sliding window of 30 days ending on the current date for each user. Count distinct login events within the window.
  - **Verification:** Outline expected outputs for sample user activity data. **Discuss the logic with Cursor to refine the approach.**

- [ ] **Task:** Implement function for 30-day login frequency.

  - **Goal:** Write efficient code to compute the feature.
  - **Details:** Use Pandas window functions or equivalent. Handle edge cases (users with less than 30 days of history).
  - **Verification:** Write unit tests (`tests/test_feature_engineering.py`) covering active users, new users, and users with gaps. **Ask Cursor to generate initial test stubs based on your logic.**

- [ ] **Task:** Test 30-day login frequency calculation.
  - **Goal:** Verify the feature is computed correctly.
  - **Details:** Execute the unit tests created in the previous step.
  - **Verification:** Run `pytest tests/test_feature_engineering.py`. **Use Cursor's chat to run the tests and debug failures.**
-
Review and refine the plan by asking follow-up questions or giving specific instructions. Continue until the workplan accurately reflects your project’s scope, providing a detailed roadmap.
(💡 Tip: As you interact with Cursor for tasks like generating workplans or documentation, remember the value of upfront guidelines. Establishing preferences for code style, communication, or problem-solving approaches—similar to a “Convention File”—can streamline interactions and improve consistency over time.)
2. 📚 Living Knowledge Base: Documenting Architecture and Integration
Capture architectural insights before they’re lost. ML development involves complex module interactions. Understanding these connections is crucial for maintainability and collaboration, especially during integration of new features or changes.
What:
A knowledge base is a collection of focused Markdown guides in a folder (knowledge/).
- Each file documents specific architecture aspects, module responsibilities, data flow, or integration patterns.
- It captures insights about the codebase, dependencies, and how to extend components.
- This is particularly useful for complex cross-module changes.
Why:
Documenting knowledge prevents information siloing. When adding features affecting multiple modules, the knowledge base provides a clear reference for correct integration, highlighting dependencies and side effects. Detailed guides reduce reliance on constant questioning, improving onboarding and collaboration.
How:
After completing a complex task or gaining insight, use Cursor to document it in the relevant knowledge base file. Make it detailed enough to guide future similar changes.
Example: Documenting adding apply_standardization to data_processor.py, which impacts feature_calculator.py, model_trainer.py, and inference_service.py.
-
After completing the integration, ask Cursor to document the process and implications:
Document the process of adding a new data transformation method to `src/features/data_processor.py`, using the `apply_standardization` implementation as an example. Explain how this change requires updates in `feature_calculator.py`, `model_trainer.py`, and `inference_service.py` for full integration. Detail the specific changes needed in each file and the reasoning. Add this guide to `knowledge/adding_data_transformations.md`. I want you to be as detailed as possible in the guide. This guide will be useful for future reference and for other developers or LLM agents to understand the changes and the implications. -
Cursor leverages code context and chat history to generate a detailed guide in the specified file:
1
2
3
4
5
6
7
8
9
10
11
12
13
14
15
16
17
18
19
20
21
22
23
24
25
26
27
28
29
30
31
32
33
34
35
36
37
38
39
40
41
42
43
44
### Guide: Adding a New Data Transformation Method (Example: `apply_standardization`)

This guide outlines typical steps and required integrations when adding a new data transformation method to `src/features/data_processor.py`, using `apply_standardization` as an example. Adding transformations here often impacts downstream modules.

**1. Implement the Core Transformation Method (`src/features/data_processor.py`)**

- **Purpose:** Write the function/method for data manipulation (scaling, encoding, etc.).
- **Details:** For `apply_standardization`, calculate mean/std on training data (`fit=True`) and apply (`fit=False`). Design to accept parameters for reusability.
- **Key Consideration:** Design the method to accept parameters (like columns to transform, fit flag, pre-calculated parameters) to make it reusable for training, validation, testing, and inference.

**2. Update Feature Calculation (`src/features/feature_calculator.py`)**

- **Purpose:** Ensure feature calculations use data appropriate for their logic after the new transformation.
- **Details:** If calculations rely on original scale, apply the new transformation _after_ features are calculated. If calculations use transformed data, update calls to pass the transformed output.
- **Example for Standardization:** Rolling statistics were calculated _before_ standardization; the pipeline script was updated accordingly.

**3. Integrate into the Training Pipeline (`src/models/model_trainer.py` or main script)**

- **Purpose:** Apply the transformation consistently to training/validation data _before_ modeling.
- **Details:**
  - **Training Data:** Call the method on training data with `fit=True`.
  - **Validation Data:** Call on validation data with `fit=False`, passing parameters from training.
  - **Parameter Saving:** **Crucially**, save parameters learned during `fit=True` (mean/std) to a persistent location (e.g., model artifact directory) for inference. Use `joblib` or `pickle`.
- **Code Location:** Typically in main data prep steps of your training script.

**4. Integrate into the Inference Pipeline (`src/prediction/inference_service.py` or main script)**

- **Purpose:** Apply the _exact same_ transformation using _saved parameters_ from training to new data during inference.
- **Details:**
  - **Parameter Loading:** Load saved parameters when the inference service starts or before processing a batch of data.
  - **Apply Transformation:** Call the method on inference data with `fit=False`, passing loaded parameters.
  - **Order:** Ensure correct sequence relative to other steps.
  - **Key Consideration:** Using the saved parameters from training is critical to prevent data leakage and ensure consistent scaling.

**5. Add/Update Tests (`tests/`)**

- **Purpose:** Write unit tests for the new method and update integration tests.
- **Details:**
  - **Unit Tests:** Test the function with various inputs/edge cases. Verify output.
  - **Integration Tests:** Add tests running data through combined feature processing and training/inference steps to ensure the standardization is applied at the right point and with the correct parameters.

Adding a new transformation method is a cross-cutting change. Following this guide helps ensure all necessary modifications are made for correct and consistent behavior across the entire ML pipeline.

---
-
Maintain focus: one guide per topic (
knowledge/data_ingestion.md,knowledge/adding_transformations.md). Use clear headings for easy searching. This builds a living documentation of your project’s architecture and insights.
3. ✅ Test-First, Zero-Regression Development: Building Safely
Ensure code correctness from the start. Writing tests before feature code leads to more robust code and fewer regressions.
What:
A test-first approach means asking Cursor to scaffold unit tests covering expected behavior and edge cases before writing the implementation code.
Why:
A comprehensive test suite is a safety net – changes are validated, bugs flagged immediately. Writing tests first enforces design clarity by requiring upfront thought about inputs, outputs, and failures. A strong suite prevents regressions during refactors or new features.
How:
Use Cursor to generate test stubs based on requirements.
-
Before implementing
data_loader.py, prompt Cursor for tests:Generate pytest stubs for data_loader.py covering empty input, invalid schema, and batch creation. -
Cursor creates a test file (
tests/test_data_loader.py) with placeholder functions:1 2 3 4 5 6 7 8 9 10 11 12 13 14 15 16 17
import pytest from src.data_loader import load_data # Assuming your function is here def test_empty_input(tmp_path): """Test handling of empty input file.""" # TODO: Implement test logic for empty input assert False # Placeholder assertion def test_invalid_schema(tmp_path): """Test handling of data with an invalid schema.""" # TODO: Implement test logic for invalid schema assert False # Placeholder assertion def test_batch_creation(): """Test that data is correctly loaded and batched.""" # TODO: Implement test logic for batch creation assert False # Placeholder assertion
-
Implement
load_data()insrc/data_loader.py. Fill in test stubs as you write code. Run tests frequently:1
pytest --maxfail=1 --disable-warnings -q
Iterate until all tests pass, ensuring code works and handles edge cases.
4. AI-Crafted, Conventional-Commit Messages: A Clean Git History
Commit changes with a clear record. Messy Git history hinders understanding, debugging, and release notes. Conventional Commits standardize messages.
What:
Use Cursor to generate semantic commits following <type>(<scope>): <description> (e.g., feat(pipeline): add rolling-window featurizer).
Why:
Semantic commits make your git log a readable history, showing what changed and why. This format enables automated tools for changelogs, version bumps, and CI triggers. Cursor makes writing good, descriptive messages frictionless.
How:
Cursor can stage changes and suggest/execute the commit command with a conventional message.
-
When ready to commit, ask:
Stage changes and commit with a conventional commit message. -
Cursor analyzes changes and suggests a message, potentially running Git commands:
1
2
git add workplan/V1.0_data_pipeline.md src/features/rolling_stats.py
git commit -m "feat(pipeline): add 7-day rolling-window feature engineering"
5. One-Shot Workflow Automation: The Power of Cursor Rules
Individual steps are powerful; automated, they become a highly efficient ritual.
What:
A single Cursor Rule file (.cursor/rules/ml-workflow.mdc) that orchestrates a sequence: update plan, document insights, commit changes, run tests.
Why:
Automating with Rules offers efficiency (one invocation replaces many), consistency (same high-quality process every time), and simplified onboarding.
How:
Define your action sequence in a Rule file.
-
Create
.cursor/rules/ml-workflow.mdc:1 2 3 4 5 6 7 8 9 10 11 12 13 14 15 16
--- description: End-to-end ML workflow: plan → docs → commit → tests globs: - "**/*.py" - "workplan/**" - "knowledge/**" alwaysApply: false --- # ML Workflow Automation 1. Generate/update `workplan/V{Major}.{Minor}_*.md` based on recent changes, conversation context, and referenced PRDs/knowledge base files. 2. Append summaries of recent experiments or significant code changes, including insights gained from AI interaction about code structure or patterns, to relevant files in `knowledge/`. 3. Run `git add .` and then `git commit -m "<AI semantic commit message summarizing changes>"` 4. Scaffold any missing tests for modified code in `src/` within the `tests/` directory. 5. Execute all tests in `tests/` until they pass, prompting for fixes if failures occur.
Note: Rule execution capabilities may vary by Cursor version.
-
Trigger the rule in any chat panel:
@ml-workflow -
Watch Cursor orchestrate the cycle, automating repetitive steps.
6. Advanced Project Rituals: Tailoring Your Workflow
Encode additional team-oriented and quality-assurance rituals into custom Cursor Rules.
Automate tasks like generating PR descriptions (@pr-template), compiling CHANGELOG.md (@release-notes), running quality checks (@code-check), or guiding data privacy reviews (@data-privacy). Each rule lives in .cursor/rules/ and is triggered via chat invocation.
Wrapping Up
By detailing the What, Why, and How for each step, you provide both motivation and practical implementation guidance.
Combining Cursor Rules with a disciplined, ritualized ML process creates a cohesive, AI-driven workflow. It’s more efficient, repeatable, scalable, and easier to teach. In my last sprint, this workflow saved two days and caught three regressions automatically.
Try this pattern on your next project. Leverage Cursor to automate and enforce your engineering rituals, making it your trusted workflow co-pilot. Focus on the challenging, creative aspects of building intelligent systems.
What’s one Cursor Rule you can’t live without? Share below!